How to Hang a Picture Without Nails
Damage-Free Picture Hanging with no marks or mess! Hang picture frames and artwork the easy way with Command™ Picture Hanging Strips.
Find out how to hang picture frames without nails below!
Command™ Hooks and Strips are the easy way to hang picture frames and artwork
Hanging up your favourite picture frames and wall art can be a daunting task. Fear of wall damage, lack of tools, or just being undecided on where to place them means frames are often left in the cupboard and not on the wall! Command™ Hooks and Strips give you the freedom to put your artwork wherever you want.
-

Free your Frames!
- Our range of Picture Hanging Strips and Hooks means mounting frames has never been so easy. With products designed for all frame types and sizes, you can hang frames and wall art in the time it takes to find the tool box.
- All Command™ strips hold strongly, yet remove cleanly, so there's no risk of getting it wrong!
- WATCH OUR HOW TO VIDEOS SEE ALL PICTURE HANGING PRODUCTS
So why should I hang my picture frames using Command™?
-
 No tools required.
No drills or tools required! Command™ Strips can be used on a variety of smooth surfaces including painted walls, tile, glass and wood. Our water resistant and outdoor strips can be used in all weathers and conditions.
-
 Holds strongly.
Command™ Strips use a clever adhesive that holds strongly for as long as you need, then removes cleanly. Remember to wait one hour for the adhesive to bond and check the weight limit on the pack!
-
 Removes cleanly.
Easy to remove - damage free! Simply stretch off to remove cleanly with no holes, marks or mess. Remember to pull the tab straight down slowly for damage free removal.
-
 3M technology.
Command™ Strips combine a number of trusted 3M technologies, to give you high performance products for all your organising and decorating needs.
How to hang a picture using Command™ Picture Hanging Strips
Watch our short videos showing you how to hang a picture using Command™, and then remove it leaving no damage to the wall.
Step-by-step walkthroughs of the proper way to apply and remove Command™ Picture Hanging Strips & Hooks so they'll work as expected.
KEY TIPS: You must wait 1 hour before hanging. When removing, stretch straight down, slowly.
Step-by-Step Guide: How to hang a picture without nails
Read through our step-by-step guide with diagrams of how to hang a picture using Command™ Picture Hanging Strips to make sure you get it right the first time, every time.
Important tips to follow when applying Command™ Picture Hanging Strips: Wait 7 days after painting before use. Remove hanging hardware from back of frame. Do not hang over beds. Do not use on wallpapers, vinyl surfaces or other delicate or weak surfaces. Do not hang valuable items. Use indoors +10°C to +40°C. Failure to follow instructions carefully may cause damage.
Step 1: Prepare
-

Wait 7 days after painting before use.
-

Remove hanging hardware. Do not apply to paper or fabric surfaces on frame.
-

First, clean the wall with isopropyl rubbing alcohol by wiping gently. Don't use household cleaners like wipes or sprays because they leave behind a slippery residue.
Step 2: Apply
-

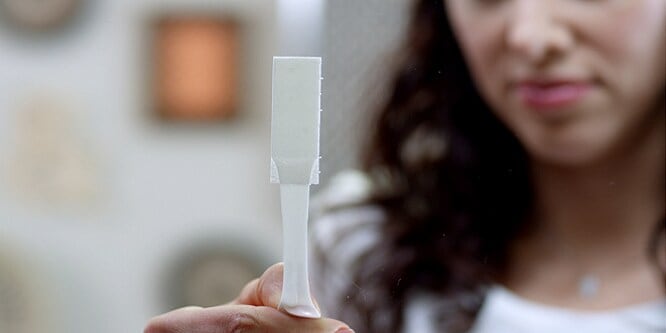
Separate the strips. Press two strips together until they click.
-

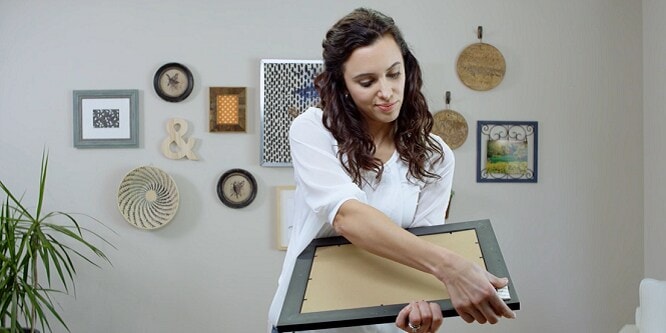
Remove one of the green liners and press onto the frame. Repeat with the other pairs of strips as shown above. Place the lower pair of strips about 2/3 down from the top of the frame. Check your package for the correct weight limits.
-

Remove the remaining liners and press frame on the wall. Press each side of the frame firmly against the wall for 30 seconds.
-

To ensure the adhesive will hold, remove the frame by grabbing the bottom corners and peeling the frame up and away from the wall. Don't pull straight off. Now, press the strips that remained on the wall for 30 seconds. Make sure to press the entire strip.
-

Wait 1 hour before reattaching the frame. Line up the strips on the frame with the strips on the wall. Press until each pair of strips click and lock in place.
Step 3: Remove
-

Remove the frame by grabbing the bottom corners and peeling the frame up and away from the wall. Don't pull straight off.
-

Remember to never pull the strips towards you or peel from the wall. Always pull straight down as slow as you can.
-

Slowly stretch the strip straight down, keeping your hand against the wall as you go. Keep stretching up to 30 cm until the hook releases from the strip.

Find the right picture hanging strip for you
Ready to hang your pictures without nails?
Discover our full range of picture hanging products suitable for different frame types and sizes.
What surfaces can I hang my pictures on without causing damage?
-
Damage-free hanging, great for surfaces notoriously difficult to drill.
- Command™ adhesive holds strongly to a variety of surfaces including solid, hollow and painted walls, and those difficult to drill - such as tiles and glass.
- They’re easily and cleanly removed – no cracks, holes, damaged plaster or sticky residue.
- Holding power and damage free removal make Command™ Strips perfect for rented homes and accommodation where drilling isn't allowed, helping you ensure you keep your deposit!
-


Looking for some inspiration for your picture hanging project?
Take a look at some picture wall projects to inspire your own.
Picture hanging frequently asked questions
Have a question? Take a look at our frequently asked questions for picture hanging, or click the link to see all frequently asked questions.
-
Q: What size Command™ Picture Strips do I need to use?
Choose the right size strips according to the weight and size of your frame: Small: 4 sets hold up to 1.8 kg. Max frame size 20cm x 25cm. Medium: 4 sets hold up to 5.4 kg. Max frame size 45cm x 60cm. Large: 4 sets hold up to 7.2 kg. Max frame size 60cm x 90cm. Narrow: 4 sets hold up to 5.4 kg. Max frame size 45cm x 60cm.

-
Q: Why do I have to wait an hour?
A: The one-hour wait ensures that the adhesive has had enough time to build strong adhesion to the wall or surface before any weight is placed on it. After initial application we always recommend that you remove the frame (Command™ Picture Strips) or Hook Piece (Command™ Hooks) from the wall, in order to press firmly on the strips for 30 seconds. Leave for at least one hour before rehanging/reattaching.
-
Q: Can I use Command™ Products on wallpaper?
A: You should not use Command™ Products on delicate or paper wallpaper. It may not adhere well to some vinyl wallpapers. Due to the wide range of wallpaper finishes available, some types may be particularly delicate. It is important to note Command™ adhesive is only as strong as the wallpaper’s adhesive bond to the surface below.


